Sunday, June 18, 2017

Yardage for Your Creations

Yardages

Remember old unused patterns can be found by searching Google-Etsy-Ebay or the pattern company itself by Pattern number and name of Vendor- or search a style.  Most times they will ship immediately and you get in a couple of days.  When GStreet has a sale as now the Summer Sale everything is 25% off including the patterns-just not the 2.97 room or the silk at 7.97.

Well, when you ask I tell you to wrap yourself in the fabric and you can tell if you have enough, BUT.....  Here are some yardages from my pattern stash. No facing, uses strip of fabric like a bias turn under. 

 Simplicity Pattern 2189 Misses' & Plus Size Sportswear

Simplicity Pattern 2189... This dress yardage is  1.75 for smallest size (32.5 inch bust + 34.5 hips) and 3 yards for the largest size (50 inch bust + 52 inch hips)


This McCalls Pattern Tie Jacket is simple to use as shrug or just a jacket to have with your sleeveless dress at the beach for on the Boardwalks

McCalls M6559

Dress Yardage   1.75 6-14 to 1 7/8 for 16  2 5/8 for 18 2 7/8 for 20 3.25 for 22

Jacket Yardages

Shrug style 1 yard 6-14------- 1 1/8 to1 3/8 16-22 

Regular length Jacket (my favorite to pack) 1.5 to 2 yards


So Little People 3 yards total for Beach Dress plus tie jacket

My People 4-5 yards for total outfit.....but so fun....

Mix your Printed Matte Jersey with a Solid Jacket that goes with your 3 or 4 dresses..... YOU GO GIRL  Beachy Gracefulness..... 


Long Sleeved Draping neckline Blouse.... LOVE THIS 

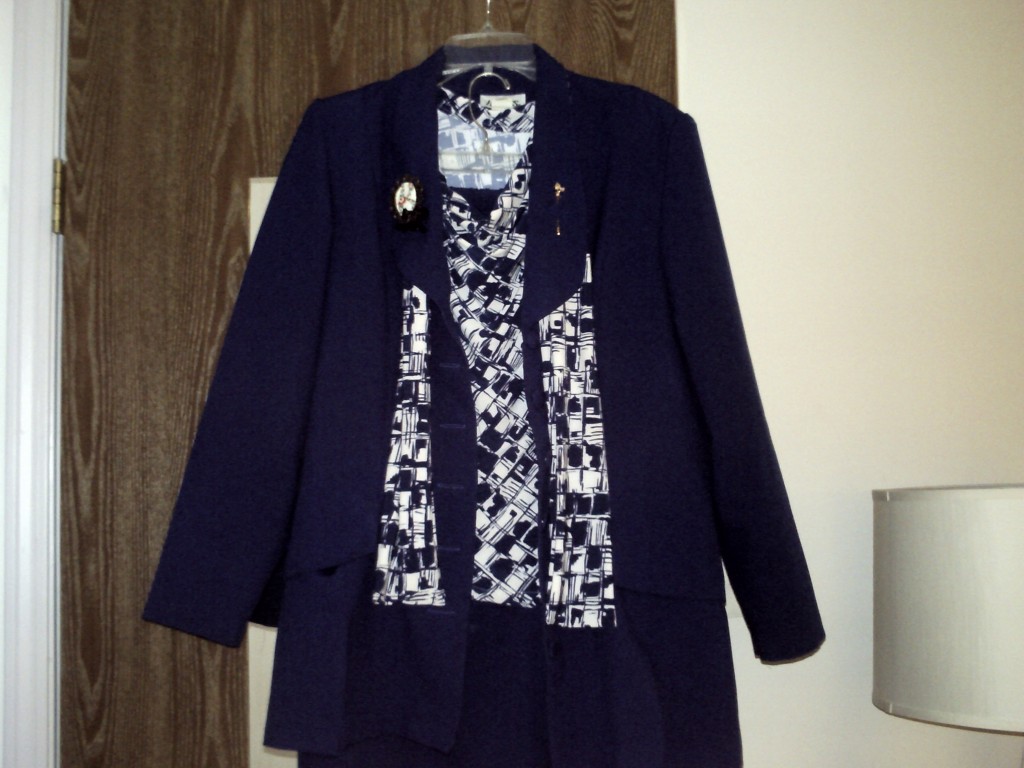
Usually this is what I wear with my Poly Poplin Suits and Tubins'

I accessorize with the leftover by making a scarf and covered button earrings

for Drapeneck blouse - Yardage 1 3/8 to 1 5/8 yds 60" wide fabric

1 7/8 to 2 3/8 for 45" wide fabric

Poly Poplin Suit with one of my blouse scarf sets... (poly poplin is only 5.98 yard and 60 inches wide)  take 25% off for Summer sale and be like me ...have 16 suits of solid colors in my closet.... some skirt and pants with jacket...

Pencil style skirt... elastic waist and kick pleat in back... the amount of yardage is the length you want it... don't need more than a yard. 60" wide fabric

Have a suit of every color for the working woman looking professional.

Yardage for suit Jacket and Skirt typical  

A plain unstructured body curve jacket like this Jacket M5668

2 yards for A and 2.5 yards for B plus yard for your skirt...

60" fabric... 3 to 4 yards for a nice little suit


Every Working Womans wardrobe should have a Black Jacket and a White Jacket to go with all their pants and skirts.


This top is easy and cute... I did have to raise the neckline.

Yardages 5/8 of solid 5/8 of lace  or 1.25 60"stretch

Simple pants stretch or cotton - elastic waist

1 5/8 to 2 3/4 60"wide  2 1/8 to 2.75 for 45"  

The SIMPLE SKIRT WITH FLOW elastic waist

2 1/8 to 2.25 60" wide or 2 1/8 to 3.75 45" wide fabric 

TUNIC TOP

1.5/8-2 1/8 60" wide or 2 1/8 to 3/1/8 45" wide

 Long -Short - Rounded or Pointed lapels - pocket flaps with or without pockets

Add covered buttons to flaps for accent


Friday, June 16, 2017

More Multi Task Sewing

Tonight:

Light Turquoise/Aqua

Royal Blue and Tan Tubins


Tan or Kaki Tubins with matching silky blouse

Lightly Pinned to cut out.. next to chair at sewing machine to sew

 Two Lycra Drape Necks and One Silk To pin and be ready to cutout and sew 


 Royal Blue Tubins'


Thursday, June 1, 2017

Cardigan, Blouse and cutting in twos

Okay,
I have filled my coffee cup.

The plan is to cut out two blouses at a time.... Both are silk, so I will be using lots of pins.
I use the long quilt pins because they are easier to work with.   I usually use as few pins as possible as I am usually in a hurry.  Today, I will have to use lots of pins because I am going to cut in pairs the shirts(blouses) and Cardigans.   The pattern is for a long cardigan-free flowing, but very fast to sew.  The shirts(blouses) are going to be my favorite drape neck pattern out of silks.  And if I have time before sewing-I will cut out one pair of gray pin striped tubins and , of course, scarves to accessorize all outfits, not to mention earrings.   Let's see how well I do today!.....


This blouse pattern has been altered for me adding to the drape and I usually do long sleeves.


This pattern I will use the cardigan, but I shortened it by about six inches so it is long and drapey, but it is still free flowing.  I pinned two at a time of the cardigan cover up.


These will be with tubins'-pink and fuschia tubins' are already made and hanging waiting for the coverup

I folded up the pattern pieces 6 inches on the bottom of the cardigan or Cover up

So you can see I pinned the pattern piece on two fabrics- one fuschia(looks purple here) and one light pink gauze.

Everywhere there is a Circle or dot...I clip so I know where it was to match.   This is particularly helpful when doing inset sleeves.  There are usually two notches (one single and one double) and 3 dots that where I put a clip.  When insetting the sleeve you match the notches and the center top clip and sometimes you have to do a little pull on your basting to match the clips from the sleeve to the clips on your shirt pieces.

 I took a sleeve from another pattern that I already knew where the length would be correct for a long sleeve and laid it over the three quarter sleeve piece to this jacket so I would be able to cut it correctly to length...

The gauze was narrow and the fuschia was wide, so I folded the gauze in half end to end when I got to doing the wide front piece and could lay the sleeve piece beside it.  The back piece was pinned on the matching fold when folded vertically.  This could be a problem if you have a nap or vertically directional print.  In this case I could pin and cut two at a time doing this type of folding.

Here is the outfit as intended.  The coverup over a draping blouse and Fuschia tubins'.

DONE


Now the Pink Cotton Gauze Coverup and then the blouses. 


The silk blouse is so light colored I will have to make a tank to go under.... Next Post... Multiple pants and blouses 2


Monday, May 29, 2017

Onward... Sewing a Blouse before work... Earrings and scarf

So, I have to work, it is Memorial day Holiday.
Button earrings out of the same material
Scarf was a silk in both of these and they help me push through to the finish line... sometimes I lay out a bangle or pin or two...  Most often I wear a Black or white blazer that enunciates the scarves and gives a place for my lapel pins and name tag at work.

I am making earrings..blouse and scarf.  Wearing Tubins already made.  Pics after work..

This is my motivational blog Blurb before work.  I must do it.

---------------------------------------------------------------------------------------------------------------

YES, I did make something every day since I wrote this little blurb.

I did a silk shirt after I wrote this one... Made earrings and a scarf.

The next day I did another silk shirt and earrings and scarf.


and Wednesday I did pink Tubins....

These Tubins were thrown in the chair after work, and all it would take to smooth them out again is throw them in the dryer for a few minutes.... They are four way stretch

This is Thursday...  So, todays task is pink cardigan and pink and white shirt to go with the pink tubins...   It is 6:20 AM... I have soaked my feet and am going to put the coffee on.  We will see how far I get.  And those pics will be on the next post.   Right this minute I will insert pics for the above creations.
So the pink one will be on the order of the yellow one... remember that one?


The pink material is cotton but a gauze so it should be wispy like this one... tubins instead of baggy pants... and the top will be a silk of pink and white.... so on to the next blog post..

Remember... I live in a cellar, basically no windows... just my fake one. and   you can see in the top pic... where I am hanging clothes on the cinderblock wall, I faked  a closet under the stairs put up temporary remote lights and that is where my guitar, coffee pot and sewing machine all reside.
Don't use no space for an excuse...  I use my bed and sometimes a card table for a cutting table.

It is about motivation, inspiration and goal setting.  Can't never did anything.   There is a world of possibilities out there if you have coffee.... and a breath of life.

Don't forget accessorizing...  Earrings to match-a bracelet or necklace adds a ton of motivation also.

My goal is to make all these clothes and then either teach sewing lessons, or sell readymades and get myself a teeny house.   So, Goal Setting is important.   Right now, I am just making an outfit a day before work and  enjoying life, as much as I can.

Friday, May 26, 2017

Sewing Motivation

This blog is as much for my motivation to complete my stash instead of just storing as it is to help you see what YOU can do.

Now-Today, I am going to cut out a Pink, Light Green, Dark Green, Bright Blue, and Lime Green Tubins.

I live in a Cellar- so the lighting is very difficult to see what color is what....

 It is a little better with a flash....

The pattern is just one piece so easy... this was posted with pattern number in

Tubins <--- click


I will put them beside my sewing machine and make one pair today, and as many as possible as fast as I can.   I already have Sparkle Black, Denim Black, Dark Blue waffle weave, Teal waffle weave, White, Coral Pink, and regular Teal colored sewn and worn once.

The problem with working in a fabric store, is you see every color possible.

 In my normal manner I will make Earrings out of the fabric and then cut out and sew the blouse.

I  am going to cut out one silk top, I have not decided which pattern, but I will post.

Here is the silk I chose to make the blouse out of.  So soft, and I added the fullnest to the drapeneck that is not for stretchknits pattern.  Butterick 3131.

This is the back of the button package where you cut out your pattern for the covered buttons you are going to wear for earrings.  Once you make the earrings you must finish the blouse.


 Here are some buttins from a package.  You see the button has a shank but you will pull that out so you have a flat back to glue your earring to your earring back

Pick the best part of the design to center

 Needlenose pliers/pattern for fabric circle and button cover.. you must pull the shank out, and pick the best part of your fabric to put on your earrings.

Pinch the shank with the needlenose and it will pop right out looking like a bent paper clip.


 After they are covered you will glue the earring back on from your bulk bag of jewelry findings.


  Done... Made a scarf and wore blue tubins... pic later..

I have to work tonight-my usual day off- so, the goal is to make a new outfit to wear.

Oh and I have to take a picture of the yellow outfit and post it on the May 2 posting.

I said it, so I have to do it!

 These are the best hangers every!... They are covered with a velvet type covering and you can hang your pants on the top edge drop the shirt on over the hook and wrap the scarf around the hook and nothing slides off!  I bought this at Target - 2 ten packs and now I am going to fill them!  More motivation!

Tuesday, May 2, 2017

Sewing Quick tips and Inspiration

A picture is worth a thousand words.... This is 20 years ago.... A sweatshirt cardigan, trim cut from daisy fabric, earrings daisys by cutting out flowers from the same fabric and using stiffy stuff and then putting an earring back on them... daisy scarf around my ponytail....  Even the cardigan clip has daisies glued on it!  That little daughter is now over 32 years old... LOL...  In the background is a cloth christmas advent calendar.   Yes, I have sewn my life away.... But such fun!

There is nothing like fabric fun... See me at G Street Fabrics in Rockville, Maryland USA  The best fabric store ever... We get designer fabrics from New York everyday and they are only 2.97 a yard.

The Treasure hunt room: From Glitter and Lace to Ralph Lauren first runs from the designers...wonderful 4 way knits... and I LOVE them all


So, my picture content has been questioned...  I truly believe a picture is worth a thousand words.
Note: my picture of myself in the mid throws of sewing as many tubins' as possible this week, I have huge bags under my eyes.  Making an outfit a day, organizing my mini store of fabric and blogging all at the same time has a no sleep penalty.

So, in honor of Google wanting more words out of me, I shall add some verbal tips.  To be quick, I sometimes lay out five pieces of lycra/matte jersey at a time and pin the selvages together to assure they are flatly laid out and pin my pattern pieces for my drape neck blouse that I love onto the stack of fabric.  You must have sharp scissors for this.  Ginghers are great scissors for this.  Do NOT pick them up in haste when you are crafting jewelry.  They will never be the same.  So, now after you get out your Butterick 3131 pattern, that has be altered to perfection for you.  Pin on your pieces, only five pieces.  No front facing in this pattern, it only has a small back facing and a small piece of interfacing for the back neck.  There is front (my front is altered to add additional draping, back, sleeves, and back neck facing. in this pattern.  After cutting out the pieces, lay your stack next to the sewing machine.  It is a really quick-sew after this.  I can go through the stack and iron on the interfacing pieces to all five or just do a blouse at a time.

Tip for cutting out pattern pieces.   When I have a pattern that I know has notches and dots to match up and places where I am going to clip I do it as I cut the pattern pieces.  So, when I pick them up to sew I just match the clips.  This pattern there is a place where your back piece has a neck interfacing and it is only sew 5/8 in to start so you don't have to clip it.  But where it lines up with the front sloping drape you are going to have to clip.  I clip the front piece of this blouse as I cut out the pattern piece.  On your sleeve pieces there are dots and notches.  I found I can clip in a little at each dot and it makes it very easy and fast for me to sew a sleeve in.  I pick up the sleeve piece and do the line of basting from one notch to the other.  Then I sew the sleeve together and hem the sleeve at the length that I have already adjusted my pattern to the length that works with my suits etc.  I turn under the bottom of the sleeve twice and top stitch.  At this point the front has already been sewn to the back and the Top shoulder seem has been top stitched through the shoulder seam to hold it in place.  I just pin the sleeve in place-ease in the fullness by matching the notches and the dot clips.  There are dot clips on my front and back pattern pieces that I clipped as I cut out those pieces, so you just line them up together when you pin and it is easy to sew the sleeves in.


1.  If I feel like I have a little time, I do five at a time.  In other words, do all five interfacing iron ons.  You have everything cut out in the stack.  Five interfacings and five back neck facings.  After ironing the interfacing on, do all five back neck facings turn under the edge a quarter of an inch and top stitch.   Sew the back neck interfacings onto all five back blouse pieces.

2.  Take all five front blouse pieces and turn under your front facing which is just a large circular slope to the blouse piece and you only need to turn under the edge quarter of an inch and top stitch.

3.  Now you have a front and back ready to sew together.  Sew your side seams together matching your notches.  I cut out my pieces to fit me with a quarter inch seam so I can just use an overcast stitch to sew the pieces together.  I don't have a serger, but if somebody asks me something at work, I like to be able to show them the seams without embarrassment of messy look seams.

Any overcast stitch will do but the one I use on the machine I am using now is the one that looks like a straight stitch on two sides and a zigzag in the middle.

If the fabric is not thick enough to not get sucked into the feed-dog I use the zipper stitch.

So, this writing out everything takes time.  Now it is Tuesday my day off.  I wore black denim looking tubins' on Sunday and Monday before I went to work I made a long cardigan type jacket out of some drapey black fabric that virtually stayed wrinkle free.  I may use this pattern for a white fabric.  Then I will have a black and a white blazer type jacket and a black and white cardigan long jacket to wear.  I virtually have almost every color you can imagine in poly poplin suits, but I am planning on trying different suit jacket patterns and reporting back here as to how easy and fast they are to sew.

This blogging may increase my coffee drinking, but I need to increase my water drinking, also.


This is my glitter outfit I wore on Sunday.  Glitter tubins-glitter was in the knit itself so no trace left.  The top had those wonderful little mirrors on it...and the accordian pleat was a slight satin type sheen woven in so I felt it suited the whole look.  I found a slightly glitter black sash to use as a scarf and I felt it was a good outfit.

The sweetheart neckline top.... quick and easy.  Hardest part is picking the material... I used the accordian pleat for the bottom, so I adjusted the pattern somewhat for the different type of fabric, and I transposed the boatneck from the slanted one onto the sweetheart so I would not be showing too much skin at work.  I have no neck and high chest, so low necklines are very low on me and have to adjusted to regular high boat.
Butterick B5045


Remember this?... Monday I made a black cardigan style jacket to go over this for a different look


I liked wearing this jacket with the long dress.  I felt flowy.

These are Lightweight Lycra pants made from the same pattern but taking the baggy capri's and extended them to long pants for the palazzo pants look and matching scarf. 

Then I made Yellow Pants the same way and used the pattern with shirt pattern and added sleeves from the lace yoke pattern, but raised the neckline and cut the lining (yellow silk under the lace with the top from this long jacket pattern and you can see how low the shirt would have been.  Of, course inappropriate for work, but when I raised the lace neckline I could wear it.


The jacket with this yellow outfit was made from a popcorn gauze that I found in 2.97.  Light and airy.  For the Yellow Jacket I took off 6 inches so it wasn't as long, but was still drapey and airy.

I may make a silk outfit of the pants, tank and jacket if I have enough material.

Pants 1 and 7/8 to 2.25 but added length 2 3/8 to 2.75+ Tunic 1.75 to 2 so with sleeves 2.50 to 2.75 depending on fabric width + Jacket 2 and 5/8 to 4.5

I added length in pants to pattern and took off length to jacket.  On this one the Top I actually made the top length but added regular lace sleeves and raised the neckline on the lace.  The silk lining was just the size of the top.